Using Lint pre-commit hook in Android project
Automate your Kotlin code lint checking process and valid code before committing to the repository


Intro
If you work in a team you will surely have felt the pain of not being all on the same page when it comes to code style and formatting. Code style and formatting are important for many reasons.
Code reviewers shouldn’t waste time checking if braces are on the wrong line or the space indentation is correct. Fortunately, there is a way to stop unformatted code from ever getting to the repository, and it all starts with Git hooks.
In this post, you will learn how to automate Ktlint and Detekt checks with a pre-commit Git hook in your Android project to run code-style checks before you commit your change list.
What are Git hooks?
Git hooks are shell scripts located in the .git/hooks directory of a Git repository. They are used to automate actions in response to specific events, such as commits or pushes.
Android project use case
Using pre-commit hooks in your Android project can be beneficial as they help maintain code quality, enforce coding standards, and prevent common mistakes from being committed.
For example, you can use pre-commit hooks to run code formatting checks, static code analysis, unit tests, or any other custom validations that you deem necessary for your project.
Using Linter tools with githooks:
There are several Kotlin linters available for Android projects. Some of the popular ones but in our example we are going to use Ktlint and Detekt.
In general Android projects case, Once the pre-commit hook is set up, it will execute the ktlint and detekt tasks when you try to make a commit.
If there are any code style or quality issues identified by the linter, the commit will be aborted, and an error message will be displayed. You will need to fix the issues indicated by the linter before you can successfully commit your changes.
🚀 So let's get started!
Step 0. Before starting to add the plugin and scripts, I hope you are having the new Android project created and ready. In my case, I am using my existing Kotlin multiplatform repository to explain steps and code.
Note: if you are already aware of installing the ktlint and detekt plugins you can skip installation step 1 and jump on step 2.
Step 1:
Now open your project ${project.rootDir}/build.gradle.kts and install the ktlint and detekt plugins below:
Ktlint config:
plugins {

    id("org.jlleitschuh.gradle.ktlint").apply(false) // https://github.com/jlleitschuh/ktlint-gradle

    //if you using version catalog
    alias(libs.plugins.ktLint)

}

allprojects {
    ...
    apply(plugin = "org.jlleitschuh.gradle.ktlint")
    ktlint {
        debug.set(true)
        verbose.set(true)
        android.set(false)
        outputToConsole.set(true)
        outputColorName.set("RED")
        filter {
            enableExperimentalRules.set(true)
            exclude { projectDir.toURI().relativize(it.file.toURI()).path.contains("/generated/") }
            include("**/kotlin/**")
        }
    }
}
Detekt config:
import io.gitlab.arturbosch.detekt.Detekt

plugins {

    id("io.gitlab.arturbosch.detekt").apply(false) // https://github.com/jlleitschuh/ktlint-gradle

    //if you using version catalog
    alias(libs.plugins.detekt)
}

detekt {
    buildUponDefaultConfig = true // preconfigure defaults
    allRules = false // activate all available (even unstable) rules.
    autoCorrect = true
    parallel = true
    config = files("config/detekt/detekt.yml")
}

tasks.withType<Detekt>().configureEach {
    reports {
        html.required.set(true) // observe findings in your browser with structure and code snippets
        txt.required.set(true) // similar to the console output, contains issue signature to manually edit baseline files
        md.required.set(true) // simple Markdown format
    }
}

tasks.withType<Detekt>().configureEach {
    jvmTarget = "17"
}
tasks.withType<io.gitlab.arturbosch.detekt.DetektCreateBaselineTask>().configureEach {
    jvmTarget = "17"
}

subprojects {
    apply(plugin = "io.gitlab.arturbosch.detekt")
    detekt {
        parallel = true
        config = files("${project.rootDir}/config/detekt/detekt.yml")
    }
}
Try to sync your project. If you are facing any issues do checkout this final ${project.rootDir}/build.gradle.kts and compare it with your ${project.rootDir}/build.gradle.kts file.
Step 2:
Now navigate to the root directory of your Android project repository. And create directories as scripts and sub-directory under scripts/pre-commit.
Also, create a shell script file named pre-commit (without any file extension) intoscripts/pre-commit the directory. Here is the shell script file content:
#!/usr/bin/env bash
echo "
===============
|  Running detekt...
===============
"

./gradlew --no-daemon --stacktrace -PdisablePreDex detekt

detektStatus=$?

# return 1 exit code if running checks fails
[ $detektStatus -ne 0 ] && exit 1

echo "
===================
|  Formatting code with ktlintFormat...
===================
"
./gradlew ktlintFormat

echo "
===================
|  Running ktlintCheck...
===================
"

./gradlew --no-daemon --stacktrace -PdisablePreDex ktlintCheck

checkStyleStatus=$?

# return 1 exit code if running checks fails
[ $checkStyleStatus -ne 0 ] && exit 1
exit 0
If you have any doubts or issues, see the final created directory with file content in the working example on the below link:
https://github.com/pranaypatel512/APODNasaCMP/tree/main/scripts
Steps 4:
Now let's go back to our ${project.rootDir}/build.gradle.kts and add some tasks in ${project.rootDir}/build.gradle.kts file as below:
// ☝️ on top here your other content of build.gradle.kts file

tasks.register("copyGitHooks", Copy::class.java) {
    description = "Copies the git hooks from /git-hooks to the .git folder."
    group = "git hooks"
    from("$rootDir/scripts/pre-commit")
    into("$rootDir/.git/hooks/")
}
tasks.register("installGitHooks", Exec::class.java) {
    description = "Installs the pre-commit git hooks from /git-hooks."
    group = "git hooks"
    workingDir = rootDir
    commandLine = listOf("chmod")
    args("-R", "+x", ".git/hooks/")
    dependsOn("copyGitHooks")
    doLast {
        logger.info("Git hook installed successfully.")
    }
}

afterEvaluate {
    tasks.getByPath(":shared:preBuild").dependsOn(":installGitHooks")
}
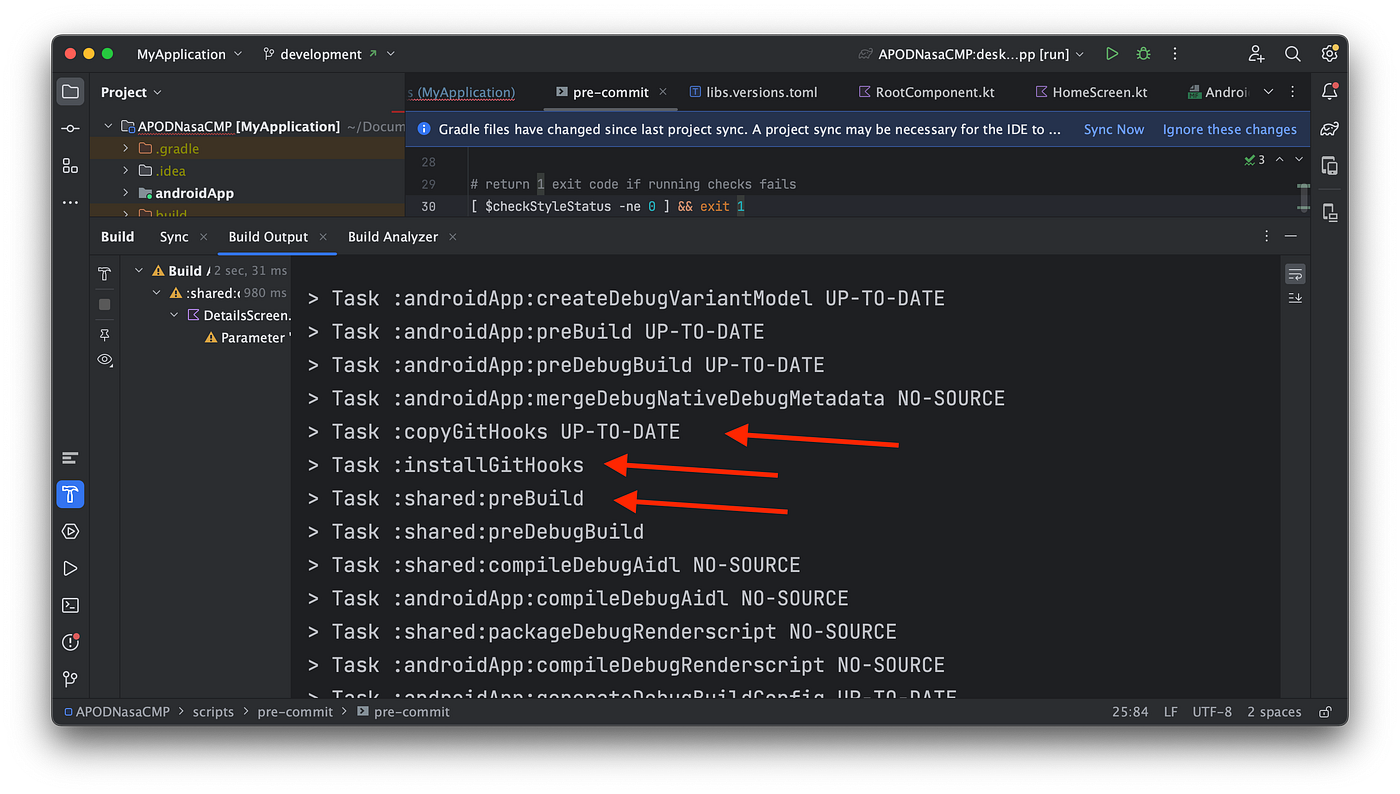
Explanation of the above gradle tasks:
copyGitHooks : this copy task will copy hook script files from $rootDir/scripts/pre-commit in to the $rootDir/.git/hooks/ directory
installGitHooks : this Exec task will start the execution of the task and call copyGitHooks and print a message after successful execution.
:shared:preBuild : example project module task that will start after installGitHooks task completed.
Step 5:
Now do clean and rebuild your project above steps will be performed to add a pre-commit hook in $rootDir/.git/hooks/ directory. If you are facing any issues do checkout this final ${project.rootDir}/build.gradle.kts and compare it with your ${project.rootDir}/build.gradle.kts file.
Step 6: Verify if git hooks are installed or not after clean and rebuild the project.
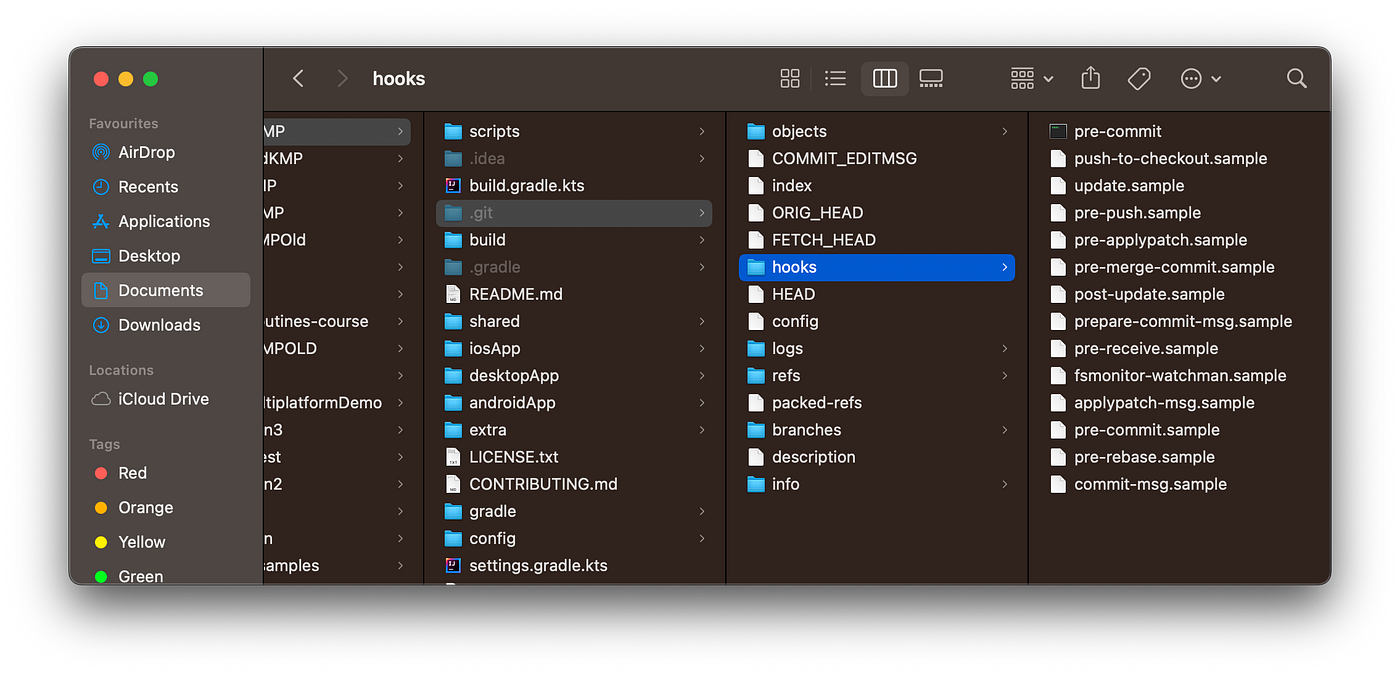
In the project’s root directory, locate the
.gitfolder. Note that this folder is hidden by default, so you may need to enable the visibility of hidden files(cmd+shift+.) and folders in your file explorer.Inside the
.gitfolder, check if there is a directory calledhooks. This is where Git stores its hooks.Inside the
hooksfolder, check if there is a new file created calledpre-commit. and opening that file you can verify the same script which we have created in$rootDir/scripts/pre-commit.
Once the pre-commit hook is in place, it will be executed automatically before each commit. If the hook script exits with a non-zero status, the commit will be aborted, allowing you to fix any issues before proceeding. Let's see how in the next section!
Verify project code validation:
To verify if a Git hook is successfully validating code using ktlint in the Git console, you can follow these steps now:
In your project make a code change in a file that would trigger the Git hook. For example, you can introduce a coding style violation in a Kotlin file.
Stage the changes by running the command
git add <file>orgit add .to stage all modified files and Attempt to make a commit by running the commandgit commit -m "Commit message".
or simply try to do a commit from the commit window from Android studioIf the Git hook is properly installed and configured, it will automatically execute the ktlint validation. that you can see in the git console as below:
Now, there are a couple of possible outcomes:
🚩 If the code change violates the ktlint rules, the Git hook will fail the commit and display an error message with information about the specific issues that need to be fixed.
✅ If the code change passes the ktlint validation, the Git commit will proceed as usual.
Let’s take a look at the summary of what we have learned:
What is git hook and how it is useful
How we can install and write a git hook script in the Android studio project
How to verify git hook installation and the advantage of using it
GitHub project:
If you need to check more about git hook, please check my GitHub repo.
https://github.com/pranaypatel512/APODNasaCMP/tree/main/scripts
Wrap Up!
Congratulations…. That was pretty cool, right? This is all the stuff you need to know about integrated Kotlin linting tools using git hooks in your Android project.

Before wrapping up, I want to take a moment to tell thank you for reading this article. Your continued support, comments, and engagement have been truly inspiring.
Don’t forget to clap👏/recommend as much as you can and also share📤 with your friends. It means a lot to me.
Also, Let’s become friends on Twitter, GitHub
Resources:
Linting tools:
Git hook docs: